
O YouTube é um dos mais antigos e populares serviços de streaming de vídeo existente na web. Se você pretende rodar um vídeo do YouTube no iOS saiba que não é possível faze-lo diretamente em um componente como o AVPlayer. Para tocar o vídeo no iOS teremos que utilizar um UIWebView para mostrar o player do YouTube desenvolvido em HTML e Javascript.
Para facilitar a interação entre as funções disponíveis em JavaScript e o Swift iremos utilizar o pod YouTube-Player-iOS-Helper. Este pod é mantido pelo próprio YouTube e pode ser encontrado no GitHub. Existe um guia na documentação da API do YouTube sobre este pod.
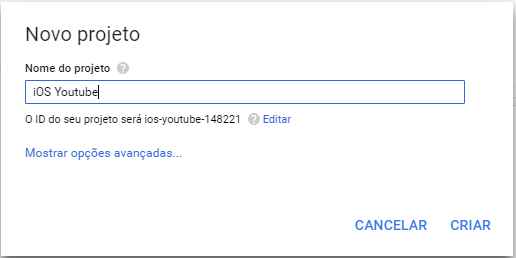
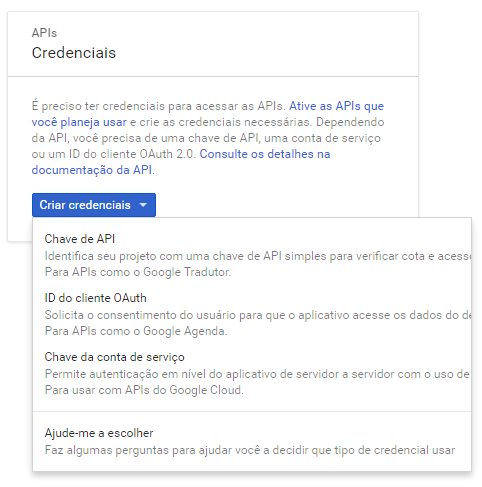
Para o nosso projeto iremos precisar de uma chave da API do Google. Abra o Google Developers Console e crie um novo projeto iOS Youtube. Com o projeto selecionado clique no menu lateral Credenciais e depois em Criar Credenciais. Na lista de tipo de credenciais selecione Chave de API.


Para aumentar a segurança da chave você pode restringi-la a um determinado site, IP ou bundle de aplicativo.

Instalando o YouTube-Player-iOS-Helper
Para adicionar a biblioteca ao projeto utilizaremos o CocoaPods. Você pode encontrar mais informações sobre a utilização do CocoaPods neste artigo.
Adicione a linha abaixo no Podfile para adicionar a biblioteca.
pod "youtube-ios-player-helper"Para adicionar o player no Storyboard basta inserir um UIView, inserir as constraints de layout e alterar a classe para YTPlayerView.
A classe YTPlayerView possui os seguintes métodos:
load(withVideoId:)load(withPlaylistId:)load(withVideoId:playerVars:)load(withPlaylistId:playerVars:)load(withPlayerParams:)
playVideo()pauseVideo()stopVideo()seek(toSeconds:allowSeekAhead:)
cueVideo(byId:startSeconds:suggestedQuality:)cueVideo(byId:startSeconds:endSeconds:suggestedQuality:)loadVideo(byId:startSeconds:suggestedQuality:)loadVideo(byId:startSeconds:endSeconds:suggestedQuality:)cueVideo(byURL:startSeconds:suggestedQuality:)cueVideo(byURL:startSeconds:endSeconds:suggestedQuality:)loadVideo(byURL:startSeconds:suggestedQuality:)loadVideo(byURL:startSeconds:endSeconds:suggestedQuality:)
cuePlaylist(byVideos:index:startSeconds:suggestedQuality:)cuePlaylist(byPlaylistId:index:startSeconds:suggestedQuality:)loadPlaylist(byPlaylistId:index:startSeconds:suggestedQuality:)loadPlaylist(byVideos:index:startSeconds:suggestedQuality:)
nextVideo()previousVideo()playVideo(at:)
playbackRate()setPlaybackRate(suggestedRate:)availablePlaybackRates()
setLoop(loop:)setShuffle(shuffle:)
videoLoadedFraction()playerState()currentTime()
playbackQuality()setPlaybackQuality(suggestedQuality:)availableQualityLevels()
duration()videoUrl()videoEmbedCode()
playlist()playlistIndex()
removeWebView()
O delegate YTPlayerViewDelegate possui os seguintes métodos:
playerViewDidBecomeReady(_:)playerView(_:didChangeTo:)playerView(_:didChangeTo:)playerView(_:receivedError:)playerView(_:didPlayTime:)playerViewPreferredWebViewBackgroundColor(_:)playerViewPreferredInitialLoading(_:)
Caso queria carregar um novo vídeo em um mesmo playerView, utilize os métodos cueVideo ou cuePlaylist. Eles não recarregam o iframe dentro do WebView o que dá uma melhor performance no carregamento do vídeo.
Codificando o aplicativo
O nosso aplicativo irá listar os 200 videos mais populares do Brasil. Para isto iremos utilizar a API de listagem de vídeos e iremos adicionar o parâmetro chart com o valor mostPopular. A documentação pode ser encontrada aqui.
Criando o Model
A resposta do vídeo vem em várias partes, e em nosso projeto iremos implementar as partes snippet (Contém detalhes básicos sobre o vídeo, como seu título, sua descrição e sua categoria.), contentDetails (Contém informações sobre o conteúdo do vídeo, incluindo sua duração e proporção.) e statistics (Contém estatísticas sobre o vídeo.). A listagem completa da estrutura do vídeo pode ser encontrada aqui.
Vamos criar um novo arquivo chamado VideoList.swift. Nele iremos definir uma struct VideoList como cabeçalho da resposta da API.
import Foundation

public struct VideoList {
  public var etag: String
  public var nextPageToken: String?
  public var totalResults: Int
  public var resultsPerPage: Int
  public var items: [VideoListItem]
}
A nossa estrutura contém algumas propriedades mas irei destacar duas delas. Iremos chamar a API trazendo a informação de 25 vídeos por vez ao invés de trazer todos os 200. Com isto iremos paginar o resultado e a propriedade nextPageToken irá armazenar o token para obtermos a próxima página. Observe que ela é opcional pois na última página ela será nula. A outra propriedade é a items que irá armazenar a estrutura com os dados dos vídeos que iremos criar a seguir.
Em todos os meus projetos sempre crio um arquivo com algumas extensões e tipos de dados para facilitar a codificação. Vamos criar o arquivo Utils.swift e adicionar o código abaixo.
import UIKit
import Foundation

public typealias JSON = [String: Any]

public enum SerializationError: Error {
  case missing(String, JSON)
  case invalid(String, Any)
}
Para ajudar na decodificação do json criei o typealias JSON que é um “apelido” para [String: Any]. Ele facilita na hora de digitar e visualizar o código. Também criei o enum SerializationError que iremos retornar sempre que encontrarmos problemas na decodificação do json. Com ele é fácil identificar os erros da decodificação pois ele retorna a tag que esperávamos encontrar e o pedaço do json onde ela deveria estar.
extension VideoList {
  init(with json: JSON) throws {
    guard let etag = json["etag"] as? String else { throw SerializationError.missing("etag", json) }
    guard let pageInfo = json["pageInfo"] as? JSON else { throw SerializationError.missing("pageInfo", json) }
    guard let totalResults = pageInfo["totalResults"] as? Int else { throw SerializationError.missing("totalResults", pageInfo) }
    guard let resultsPerPage = pageInfo["resultsPerPage"] as? Int else { throw SerializationError.missing("resultsPerPage", pageInfo) }
    guard let items = json["items"] as? [JSON] else { throw SerializationError.missing("items", json) }

    self.etag = etag
    self.totalResults = totalResults
    self.resultsPerPage = resultsPerPage
    self.items = [VideoListItem]()

    if let nextPageToken = json["nextPageToken"] as? String {
      self.nextPageToken = nextPageToken
    }

    for item in items {
      do {
        let videoListItem = try VideoListItem(with: item)

        self.items.append(videoListItem)
      }
    }
  }
}
Voltando ao VideoList.swift criamos um initializer que recebe um JSON e gera uma exceção caso não consiga inicializar o JSON.
Vamos criar agora a estrutura do video.
public struct VideoListItem {
  public var kind: String
  public var etag: String
  public var id: String
  public var contentDetails: VideoListItemDetail
  public var statistics: VideoListItemStatistics
  public var snippet: VideoListSnippet
}
Na struct VideoListItem podemos destacar a propriedade id que é o identificador do vídeo necessário para a sua visualização.
extension VideoListItem {
  init(with json: JSON) throws {
    guard let kind = json["kind"] as? String else { throw SerializationError.missing("kind", json) }
    guard let etag = json["etag"] as? String else { throw SerializationError.missing("etag", json) }
    guard let id = json["id"] as? String else { throw SerializationError.missing("id", json) }
    guard let contentDetails = json["contentDetails"] as? JSON else { throw SerializationError.missing("contentDetails", json) }
    guard let statistics = json["statistics"] as? JSON else { throw SerializationError.missing("statistics", json) }
    guard let snippet = json["snippet"] as? JSON else { throw SerializationError.missing("snippet", json) }

    self.kind = kind
    self.etag = etag
    self.id = id

    do {
      self.contentDetails = try VideoListItemDetail(with: contentDetails)
      self.statistics = try VideoListItemStatistics(with: statistics)
      self.snippet = try VideoListSnippet(with: snippet)
    }
  }
}
Criamos um initializer para a struct que recebe um JSON e gera um exceção caso encontre algum problema na decodificação do json.
public struct VideoListItemDetail {
  public var duration: Int //seconds
  public var dimension: String
  public var definition: String
  public var caption: Bool
  public var licensedContent: Bool
  public var projection: String
}
Na struct VideoListItemDetail podemos destacar a propriedade duration que é a duração do vídeo em segundos.
extension VideoListItemDetail {
  init(with json: JSON) throws {
    guard let duration = json["duration"] as? String else { throw SerializationError.missing("duration", json) }
    guard let dimension = json["dimension"] as? String else { throw SerializationError.missing("dimension", json) }
    guard let definition = json["definition"] as? String else { throw SerializationError.missing("definition", json) }
    guard let caption = json["caption"] as? String else { throw SerializationError.missing("caption", json) }
    guard let licensedContent = json["licensedContent"] as? Bool else { throw SerializationError.missing("licensedContent", json) }
    guard let projection = json["projection"] as? String else { throw SerializationError.missing("projection", json) }

    self.dimension = dimension
    self.definition = definition
    self.licensedContent = licensedContent
    self.projection = projection
    self.duration = 0

    if let captionBool = Bool(caption) {
      self.caption = captionBool
    } else {
      throw SerializationError.invalid("caption", json)
    }

    do {
      self.duration = getDuration(from: duration)
    }
  }
}
Como nas outras structs criamos um initializer que recebe um JSON e retorna uma exceção caso haja algum erro. Note que pra propriedade caption verificamos se ela existe e se ela tem um valor Bool válido.
extension VideoListItemDetail {
  fileprivate mutating func getDuration(from duration: String) -> Int {
    var minuteString = ""
    var secondString = ""
    var temp = ""
    var result = 0

    for char in duration.characters {
      if char == "M" {
        minuteString = temp
        temp = ""
      }  else if char == "S" {
        secondString = temp
      } else if char.isNumeric {
        temp = temp + String(char)
      }
    }

    if let minute = Int(minuteString) {
      result = minute * 60
    }

    if let second = Int(secondString) {
      result = result + second
    }

    return result
  }
}
A duração do vídeo vem em no formato ISO 8601 que iremos transformar em segundos com o método getDuration(from:). Veja o que diz a documentação da API sobre o campo:
A duração do vídeo. O valor da tag é uma duração ISO 8601 no formato PT#M#S, onde as letras PT indicam que o valor especifica um período e M e S se referem à duração em minutos em segundos, respectivamente. Os caracteres # que precedem as letras M e S são inteiros que especificam o número de minutos (ou segundos) do vídeo. Por exemplo, um valor PT15M51S indica que o vídeo tem 15 minutos e 51 segundos de duração.
extension Character {
  var isNumeric: Bool {
    let s = String(self).unicodeScalars
    let uni = s[s.startIndex]

    let digits = NSCharacterSet.decimalDigits as NSCharacterSet

    return digits.longCharacterIsMember(uni.value)
  }
}
No método utilizamos uma extensão criada no arquivo Utils.swift.
public struct VideoListItemStatistics {
  public var viewCount: Int
  public var likeCount: Int
  public var dislikeCount: Int
  public var favoriteCount: Int
  public var commentCount: Int
}
Na struct VideoListItemStatistics temos as quantidades de visualizações e comentários assim como a quantidade de likes, dislikes e favorites.
extension VideoListItemStatistics {
  init(with json: JSON) throws {
    if let commentCount = json["commentCount"] as? String, let commentCountInt = Int(commentCount) {
      self.commentCount = commentCountInt
    } else {
      self.commentCount = 0
    }

    if let likeCount = json["likeCount"] as? String, let likeCountInt = Int(likeCount) {
      self.likeCount = likeCountInt
    } else {
      self.likeCount = 0
    }

    if let dislikeCount = json["dislikeCount"] as? String, let dislikeCountInt = Int(dislikeCount) {
      self.dislikeCount = dislikeCountInt
    } else {
      self.dislikeCount = 0
    }

    if let favoriteCount = json["favoriteCount"] as? String, let favoriteCountInt = Int(favoriteCount) {
      self.favoriteCount = favoriteCountInt
    } else {
      self.favoriteCount = 0
    }

    if let viewCount = json["viewCount"] as? String, let viewCountInt = Int(viewCount) {
      self.viewCount = viewCountInt
    } else {
      self.viewCount = 0
    }
  }
}
Como nenhuma das propriedades acima é obrigatória, atribuímos zero as que forem nulas.
public struct VideoListSnippet {
  public var publishedAt: Date
  public var channelId: String
  public var title: String
  public var description: String
  public var thumbnail: String
  public var channelTitle: String
  public var categoryId: Int
  public var defaultAudioLanguage: String?
}
A struct VideoListSnippet tem as principais propriedades que iremos utilizar na apresentação do vídeo tais como título, data da publicação, descrição e imagem de exibição.
extension VideoListSnippet {
  init(with json: JSON) throws {
    guard let publishedAt = json["publishedAt"] as? String else { throw SerializationError.missing("publishedAt", json) }
    guard let channelId = json["channelId"] as? String else { throw SerializationError.missing("channelId", json) }
    guard let title = json["title"] as? String else { throw SerializationError.missing("title", json) }
    guard let description = json["description"] as? String else { throw SerializationError.missing("description", json) }
    guard let thumbnails = json["thumbnails"] as? JSON else { throw SerializationError.missing("thumbnails", json) }
    guard let channelTitle = json["channelTitle"] as? String else { throw SerializationError.missing("channelTitle", json) }
    guard let categoryId = json["categoryId"] as? String else { throw SerializationError.missing("categoryId", json) }

    guard let publishedDate = dateFormatter.date(from: publishedAt) else { throw SerializationError.invalid("publishedAt", publishedAt) }
    guard let categoryIdInt = Int(categoryId) else { throw SerializationError.invalid("categoryId", categoryId) }

    self.publishedAt = publishedDate
    self.channelId = channelId
    self.title = title
    self.description = description
    self.channelTitle = channelTitle
    self.categoryId = categoryIdInt

    if let standard = thumbnails["standard"] as? JSON {
      guard let url = standard["url"] as? String else { throw SerializationError.missing("url", standard) }
      self.thumbnail = url
    } else if let high = thumbnails["high"] as? JSON {
      guard let url = high["url"] as? String else { throw SerializationError.missing("url", high) }
      self.thumbnail = url
    } else if let medium = thumbnails["medium"] as? JSON {
      guard let url = medium["url"] as? String else { throw SerializationError.missing("url", medium) }
      self.thumbnail = url
    } else if let defaultThumbnail = thumbnails["default"] as? JSON {
      guard let url = defaultThumbnail["url"] as? String else { throw SerializationError.missing("url", defaultThumbnail) }
      self.thumbnail = url
    } else {
      throw SerializationError.invalid("thumbnails", thumbnails)
    }

    if let defaultAudioLanguage = json["defaultAudioLanguage"] as? String {
      self.defaultAudioLanguage = defaultAudioLanguage
    }
  }
}
No initializer podemos destacar a obtenção da imagem de exibição onde tentamos obter a imagem em diversas resoluções tendo como prioridade standard, high, medium e default. Caso nenhuma delas seja encontrada é gerada uma exeção.
public var dateFormatter: DateFormatter {
  let dateFormatter = DateFormatter()
  dateFormatter.locale = Locale(identifier: "en_US_POSIX")
  dateFormatter.dateFormat = "yyyy'-'MM'-'dd'T'HH':'mm':'ss'.'zzz'Z'"
  dateFormatter.timeZone = TimeZone(secondsFromGMT: 0)

  return dateFormatter
}
Também temos mais um código do arquivo Utils.swift onde criamos a propriedade calculada dateFormatter. Como a criação do objeto da classe DateFormatter é uma tarefa dispendiosa criamos esta propriedade uma vez e a reutilizamos várias vezes.
Agora que o nosso modelo está pronto precisamos de uma struct para buscar as informações do vídeo na API do YouTube. Vamos criar a struct Youtube.
import UIKit
import Foundation

public struct Youtube {
  fileprivate enum Addresses: String {
    case youtubeAPI = "https://www.googleapis.com/youtube/"
    case apiVersion = "v3/"
    case videos = "videos"

    static public func getVideosV3() -> String {
      return self.youtubeAPI.rawValue + self.apiVersion.rawValue + self.videos.rawValue
    }
  }

  fileprivate var apiKey: String
  fileprivate var part: String
  fileprivate var chart: String
  fileprivate var regionCode: String
  fileprivate var maxResults: Int

  fileprivate var dataTask: URLSessionDataTask?

  public init() {
    self.apiKey = ""
    self.part = "contentDetails,statistics,snippet"
    self.chart = "mostPopular"
    self.regionCode = "BR"
    self.maxResults = 25
  }

  public mutating func set(apiKey: String) {
    self.apiKey = apiKey
  }
}
Começaremos analisando o enum Addresses que contém as partes que compõem o endereço da API. Gosto de utilizar desta forma porque depois podemos fazer alteraçoes como mudar a versão da API ou acrescentar um outro recurso da API como channels, comments ou playlists por exemplo. O método getVideosV3() retorna a string completa.
Como propriedade temos part, chart, regionCode e maxResults como parâmetros da API. No inicializador da struct definimos os valores para estes parâmetros sendo "contentDetails,statistics,snippet" como as informações do vídeo que iremos requisitar. "mostPopular" como parâmetro da propriedade chart para trazer os vídeos mais populares como vimos anteriormente. "BR" como a região Brasil. 25 como a quantidade de vídeos que iremos buscar por consulta.
Por último temos o método set(apiKey:) que atribui a nossa API_Key.
public mutating func getTrendingVideosBrasil(nextPage: String?, callback: @escaping VideoListCallback) {
  dataTask?.cancel()

  var urlComponents = URLComponents(string: Addresses.getVideosV3())!
  var queryItems = [URLQueryItem]()

  queryItems.append(URLQueryItem(name: "part", value: part))
  queryItems.append(URLQueryItem(name: "chart", value: chart))
  queryItems.append(URLQueryItem(name: "maxResults", value: String(maxResults)))
  queryItems.append(URLQueryItem(name: "regionCode", value: regionCode))

  if let nextPageToken = nextPage {
    queryItems.append(URLQueryItem(name: "pageToken", value: nextPageToken))
  }

  queryItems.append(URLQueryItem(name: "key", value: apiKey))

  urlComponents.queryItems = queryItems

  dataTask = URLSession.shared.dataTask(with: urlComponents.url!) { (data, response, error) in
    DispatchQueue.main.async {
      UIApplication.shared.isNetworkActivityIndicatorVisible = false
    }

    if let error = error {
      callback(VideoListResult.error(error: YoutubeError.Error(msg: "\(error)")))
    } else if let data = data {
      if let json = try? JSONSerialization.jsonObject(with: data, options: []) as? JSON {
        if let httpStatus = response as? HTTPURLResponse, httpStatus.statusCode != 200 {
          callback(VideoListResult.error(error: YoutubeError.Error(msg: "\(json)")))
        } else {
          do {
            let videoList = try VideoList(with: json!)

            callback(VideoListResult.success(videoList: videoList))
          } catch SerializationError.missing(let property, let data) {
            callback(VideoListResult.error(error: YoutubeError.Format(msg: "Missing property \(property).\n Data: \(data)")))
          } catch SerializationError.invalid(let property, let data) {
            callback(VideoListResult.error(error: YoutubeError.Format(msg: "Invalid data for property \(property).\n Data: \(data)")))
          } catch {
            callback(VideoListResult.error(error: YoutubeError.Error(msg: String(data: data, encoding: .utf8)!)))
          }
        }
      } else {
        callback(VideoListResult.error(error: YoutubeError.Format(msg: String(data: data, encoding: .utf8)!)))
      }
    }
  }

  UIApplication.shared.isNetworkActivityIndicatorVisible = true

  dataTask?.resume()
}
No método getTrendingVideosBrasil(nextPage:callback:) é onde realizamos a chamada da API. Começamos criando uma URL com a ajuda do enum Addresses. Em seguida montamos o resto da url adicionando os parâmetros da chamada. Para acrescentar os parâmetros utilizamos a variável queryItems do tipo [URLQueryItem]. Com a struct URLQueryItem podemos criar os parâmetros com o initializer init(name:value:). Utilizando esta struct não precisamos nos preocupar com a formatação dos caracteres das propriedades pois eles já virão no formato correto.
Temos o parâmetro pageToken da API que informamos quando for a requisição de uma nova página. Como o parâmetro nextPage do método é opcional não iremos utiliza-lo na primeira e na última requisição.
Para realizar a requisição utilizamos o URLSession padrão do iOS verificando se o error é nulo, se o data é um json válido e a response possui o código 200. Depois chamamos o initializer da classe VideoList passando o json. Como o initializer gera exceção fazemos a chamada em um do catch.
Caso o objeto seja gerado com sucesso realizamos a chamada do callback callback(VideoListResult.success(videoList: videoList)). Caso tenha algum erro realizamos a chamada do callback passando o erro.
public enum VideoListResult {
  case success(videoList: VideoList)
  case error(error: Error)
}

public enum YoutubeError: Error {
  case Authenticate(msg: String)
  case Format(msg: String)
  case Empty(msg: String)
  case Error(msg: String)
}

public typealias VideoListCallback = (VideoListResult) -> Void
Como em outras partes do código criamos outros alias e enums no Utils.swift para facilitar a codificação. O enum VideoListResult contém os possíveis resultados da chamada da API. Pode ser um objeto VideoList em caso de sucesso ou um YouTubeError em caso de erro.
Como calback temos o typealias VideoListCallback que corresponde a uma closure que recebe um VideoListResult e não tem retorno.
Apresentando os vídeos
O aplicativo consiste de duas telas com tableView. Na primeira tela iremos listar os vídeos mostrando a imagem do vídeo, o título e as estatísticas (like, dislike, view, comment e favorite). No segunda tela exibiremos o vídeo no lugar da imagem e acrescentaremos a descrição, a data da postagem e a duração. Caso o usuário altere a posição do celular para paisagem o player do vídeo ocupará a tela inteira.


import UIKit

class YoutubeTableViewController: UITableViewController {
  fileprivate enum Cells {
    static let youtubeCell = "YoutubeCell"
  }

  fileprivate enum Segues {
    static let showDetailSegue = "showDetailSegue"
  }

  // MARK: - Properties
  override var supportedInterfaceOrientations: UIInterfaceOrientationMask {
    return .portrait
  }

  public var youtube: Youtube!

  fileprivate var videoList: VideoList?
  fileprivate var timer: Timer!

  // MARK: - LifeCycle Methods
  override func viewDidLoad() {
    super.viewDidLoad()

    title = "Youtube Trending Brasil"

    getVideos()
  }

  // MARK: - Navigation
  override func prepare(for segue: UIStoryboardSegue, sender: Any?) {
    if segue.identifier == Segues.showDetailSegue {
      let videoListItem = sender as! VideoListItem

      let youtubeVideoTableViewController = segue.destination as! YoutubeVideoTableViewController
      youtubeVideoTableViewController.videoListItem = videoListItem
    }
  }

  // MARK: - Private Methods
  fileprivate func getVideos(nextPage: String? = nil) {
    youtube.getTrendingVideosBrasil(nextPage: nextPage) { response in
      switch response as VideoListResult {
        case .success(let videoList):
          DispatchQueue.main.sync {
            if let _ = nextPage {
              self.videoList!.items.append(contentsOf: videoList.items)
              self.videoList!.etag = videoList.etag
              self.videoList!.nextPageToken = videoList.nextPageToken
              self.videoList!.totalResults = videoList.totalResults
              self.videoList!.resultsPerPage = videoList.resultsPerPage
            } else {
              self.videoList = videoList
            }

            self.tableView.reloadData()
          }
        case .error(let error):
          print(error)
      }
    }
  }
}
Vamos destacar alguns códigos mostrados acima. Primeiramente temos a propriedade supportedInterfaceOrientations onde limitamos a exibição do controller para a posição retrato. A propriedade videoList será onde armazenaremos os vídeos retornados pela API do YouTube. A propriedade timer será utilizada para exibir o detalhe do vídeo que estiver mais ao centro da tela caso o aplicativo fique 3 segundos sem interação. No método prepare(for:sender:) iremos passar os dados do vídeo para a tela de detalhe.
O método getVideos(nextPage:) é o responsável por buscar a lista de vídeos. Ele é chamado no método viewDidLoad() com o parâmetro nextPage igual a nil. Nele utilizamos a nossa struct Youtube com a chamada youtube.getTrendingVideosBrasil(nextPage:). Caso seja retornado a lista de vídeos, verificamos se é uma nova página para atualizarmos a propriedade videoList acrescentando os novos vídeos, ou se é a primeira chamada onde iremos atribuir o resultado diretamente à propriedade.
OBS: Em um aplicativo comercial iríamos adicionar os vídeos sem recarregar o tableView.
// MARK: -
extension YoutubeTableViewController {
  // MARK: - UITableViewDataSource
  override func tableView(_ tableView: UITableView, numberOfRowsInSection section: Int) -> Int {
    return videoList?.items.count ?? 0
  }

  override func tableView(_ tableView: UITableView, cellForRowAt indexPath: IndexPath) -> UITableViewCell {
    let cell = tableView.dequeueReusableCell(withIdentifier: Cells.youtubeCell, for: indexPath) as! YoutubeTableViewCell
    let videoListItem = videoList!.items[indexPath.row]

    cell.setupCell(with: videoListItem)

    return cell
  }
}
No protocolo UITableViewDataSource implementamos o método tableView(_:numberOfRowsInSection:) para retornar a quantidade de vídeos. No método tableView(_:cellForRowAt:) criamos uma célula do tipo YoutubeTableViewCell que iremos definir a seguir. Utilizamos o método setupCell(with:) para preencher a célula com a informação do vídeo.
import UIKit
import Foundation

class YoutubeTableViewCell: UITableViewCell {
  @IBOutlet weak var videoImageView: UIImageView!
  @IBOutlet weak var titleLabel: UILabel!
  @IBOutlet weak var likeCountLabel: UILabel!
  @IBOutlet weak var dislikeCountLabel: UILabel!
  @IBOutlet weak var favoriteCountLabel: UILabel!
  @IBOutlet weak var viewCountLabel: UILabel!
  @IBOutlet weak var commentCountLabel: UILabel!

  fileprivate var videoListItem: VideoListItem!
  fileprivate var dataTask: URLSessionDataTask?

  override func awakeFromNib() {
    super.awakeFromNib()

    clearCell()
  }

  override func prepareForReuse() {
    clearCell()
  }

  public func setupCell(with videoListItem: VideoListItem) {
    self.videoListItem = videoListItem

    titleLabel.text = videoListItem.snippet.title
    likeCountLabel.text = numberFormatter.string(from: NSNumber(value: videoListItem.statistics.likeCount))
    dislikeCountLabel.text = numberFormatter.string(from: NSNumber(value: videoListItem.statistics.dislikeCount))
    favoriteCountLabel.text = numberFormatter.string(from: NSNumber(value: videoListItem.statistics.favoriteCount))
    viewCountLabel.text = numberFormatter.string(from: NSNumber(value: videoListItem.statistics.viewCount))
    commentCountLabel.text = numberFormatter.string(from: NSNumber(value: videoListItem.statistics.commentCount))

    getPhoto()
  }

  private func clearCell() {
    videoImageView.image = nil
    titleLabel.text = ""
    likeCountLabel.text = "0"
    dislikeCountLabel.text = "0"
    favoriteCountLabel.text = "0"
    viewCountLabel.text = "0"
    commentCountLabel.text = "0"
  }
}
O método setupCell(with:) utiliza o objeto numberFormatter para formatar a quantidade dos dados estatísticos e chama o método getPhoto() para buscar a imagem do vídeo.
public var numberFormatter: NumberFormatter {
  let numberFormatter = NumberFormatter()
  numberFormatter.locale = Locale.autoupdatingCurrent
  numberFormatter.numberStyle = .decimal
  numberFormatter.alwaysShowsDecimalSeparator = false
  numberFormatter.maximumFractionDigits = 0

  return numberFormatter
}
O objeto numberFormatter foi definido no fonte Utils.swift.
extension YoutubeTableViewCell {
  fileprivate func getPhoto() {
    let tempPath = FileManager.default.urls(for: .cachesDirectory, in: .userDomainMask).first!
    let photoPath = tempPath.appendingPathComponent("t-\(videoListItem.id).jpg")

    if FileManager.default.fileExists(atPath: photoPath.path) {
      if let photo = UIImage(contentsOfFile: photoPath.path) {
        self.videoImageView.image = photo
      }
    } else {
      downloadPhoto()
    }
  }

  fileprivate func downloadPhoto() {
    if let url = URL(string: videoListItem.snippet.thumbnail) {
      dataTask?.cancel()

      dataTask = URLSession.shared.dataTask(with: url) { [weak self] (data, response, error) in
        if let weakSelf = self {
          if let error = error {
            print(error)
          } else if let data = data, let httpStatus = response as? HTTPURLResponse, httpStatus.statusCode == 200 {
            if let image = UIImage(data: data) {
              let _ = image.saveToFileAsJPEG(withName: "t-\(weakSelf.videoListItem.id)")

              DispatchQueue.main.sync {
                weakSelf.videoImageView.image = image
              }
            }
          }
        }
      }

      dataTask?.resume()
    }
  }
}
A método getPhoto() realiza um cache das imagens dos vídeos armazenando-as no diretório de cache do aplicativo. O iOS irá apagar as imagens do diretório caso precise de mais espaço e estas imagens não ocuparão espaço de backup do usuário. Caso a imagem do vídeo não tenha sido baixada ainda o método downloadPhoto() é chamado para baixar a imagem. Novamente utilizamos o URLSession para realizar o download da imagem e armazená-la no diretório de cache.
Importante notar o uso de weak self para permitir que a célula seja desalocada caso o usuário role o vídeo para fora da tela antes do download ser concluído.
extension UIImage {
  func saveToFileAsJPEG(withName name: String) -> String? {
    if let data = UIImageJPEGRepresentation(self, 1.0) {
      let filename = getCacheDirectory().appendingPathComponent("\(name).jpg")

      do {
        try data.write(to: filename)

        return filename.absoluteString
      } catch {
        return nil
      }
    } else {
      return nil
    }
  }

  private func getCacheDirectory() -> URL {
    return FileManager.default.urls(for: .cachesDirectory, in: .userDomainMask).first!
  }
}
Os métodos saveToFileAsJPEG(withName:) e getCacheDirectory() foram definidos no Utils.swift.
// MARK: -
extension YoutubeTableViewController {
  // MARK: - UITableViewDelegate
  override func tableView(_ tableView: UITableView, willDisplay cell: UITableViewCell, forRowAt indexPath: IndexPath) {
    // Does an animation
    cell.layer.transform = CATransform3DMakeScale(0.1, 0.1, 1)

    UIView.animate(withDuration: 0.5, animations: {
      cell.layer.transform = CATransform3DMakeScale(1.05, 1.05, 1)
    }, completion: { finished in
      UIView.animate(withDuration: 0.2, animations: {
        cell.layer.transform = CATransform3DMakeScale(1, 1, 1)
      })
    })

    // Load more data
    if videoList!.items.count - indexPath.row == 5 && videoList!.items.count < videoList!.totalResults {
      getVideos(nextPage: videoList!.nextPageToken)
    }

    // Plays the video in middle of screen after 3 seconds
    timer?.invalidate()
    timer = Timer.scheduledTimer(timeInterval: 3.0, target: self, selector: #selector(self.showVideo), userInfo: nil, repeats: false)
  }

  override func tableView(_ tableView: UITableView, didSelectRowAt indexPath: IndexPath) {
    timer.invalidate()

    let videoListItem = videoList!.items[indexPath.row]

    performSegue(withIdentifier: Segues.showDetailSegue, sender: videoListItem)
  }

  func showVideo() {
    let center = tableView.convert(self.view.center, to: tableView) + tableView.contentOffset

    if let indexPath = tableView.indexPathForRow(at: center) { // Get the indexPath of the cell in middle of screen
      timer.invalidate()

      let videoListItem = videoList!.items[indexPath.row]

      performSegue(withIdentifier: Segues.showDetailSegue, sender: videoListItem)
    }
  }
}
Voltando a classe YoutubeTableViewController temos a implementação do protocolo UITableViewDelegate. No método tableView(_:willDisplay:forRowAt:) realizamos três tarefas.
A primeira é uma animação da célula assim que ela aparece na tela. Utilizamos o método animation(withDuration:animations:) para alterar o layer.transform da célula e criar a animação.
A segunda tarefa é carregar a próxima página de vídeos quando o usuário chegar perto do fim da lista atual. Verificamos se o usuário chegou nos últimos cinco registros da lista e se a lista possui mais páginas. Caso a condição seja verdadeira chamamos o método getVideos(nextPage:) passando o token da próxima página como parâmetro.
A terceira tarefa é iniciar o timer para que ele acione o método showVideo() quando o tableView ficar três segundos sem iteração. O método showVideo() calcula qual célula está no centro da tela e navega até o detalhe do vídeo da célula.
public func +(lhs: CGPoint, rhs: CGPoint) -> CGPoint {
  return CGPoint(x: lhs.x + rhs.x, y: lhs.y + rhs.y)
}
Adicionei o fonte acima no Utils.swift para facilitar o cálculo do offset da tableView.
import UIKit
import youtube_ios_player_helper

class YoutubeVideoTableViewController: UITableViewController {
  //MARK: - Outlets
  @IBOutlet weak var playerView: YTPlayerView!
  @IBOutlet weak var titleLabel: UILabel!
  @IBOutlet weak var publishedAtLabel: UILabel!
  @IBOutlet weak var durationLabel: UILabel!
  @IBOutlet weak var likeCountLabel: UILabel!
  @IBOutlet weak var dislikeCountLabel: UILabel!
  @IBOutlet weak var favoriteCountLabel: UILabel!
  @IBOutlet weak var viewCountLabel: UILabel!
  @IBOutlet weak var commentCountLabel: UILabel!
  @IBOutlet weak var descriptionLabel: UILabel!

  // MARK: - Properties
  override var supportedInterfaceOrientations: UIInterfaceOrientationMask {
    return .allButUpsideDown
  }

  public var videoListItem: VideoListItem!

  // MARK: - Lifecycle Methods
  override func viewDidLoad() {
    super.viewDidLoad()

    title = videoListItem.snippet.title

    playerView.delegate = self

    loadData()
  }

  // MARK: - Private Methods
  private func loadData() {
    titleLabel.text = videoListItem.snippet.title
    likeCountLabel.text = numberFormatter.string(from: NSNumber(value: videoListItem.statistics.likeCount))
    dislikeCountLabel.text = numberFormatter.string(from: NSNumber(value: videoListItem.statistics.dislikeCount))
    favoriteCountLabel.text = numberFormatter.string(from: NSNumber(value: videoListItem.statistics.favoriteCount))
    viewCountLabel.text = numberFormatter.string(from: NSNumber(value: videoListItem.statistics.viewCount))
    commentCountLabel.text = numberFormatter.string(from: NSNumber(value: videoListItem.statistics.commentCount))
    publishedAtLabel.text = DateFormatter.localizedString(from: videoListItem.snippet.publishedAt, dateStyle: .short, timeStyle: .short)

    // Get video duration
    let hour = Int(videoListItem.contentDetails.duration / 3_600)
    let minute = Int(videoListItem.contentDetails.duration / 60) - Int(hour * 60)
    let second = Int(videoListItem.contentDetails.duration - Int(hour * 3_600) - Int(minute * 60))

    if hour > 0 {
      durationLabel.text = "\(hour < 10 ? "0" : "")\(hour):\(minute < 10 ? "0" : "")\(minute):\(second  0 {
      durationLabel.text = "\(minute < 10 ? "0" : "")\(minute):\(second < 10 ? "0" : "")\(second)"
    } else {
      durationLabel.text = "\(second < 10 ? "0" : "")\(second)"
    }

    // Get formatted video description
    if let detector = try? NSDataDetector(types: NSTextCheckingResult.CheckingType.link.rawValue) {
      let links = detector.matches(in: videoListItem.snippet.description, options: .reportCompletion, range: NSMakeRange(0, videoListItem.snippet.description.characters.count))

      let attributedDescription = NSMutableAttributedString(string: videoListItem.snippet.description)

      for link in links {
         attributedDescription.setAsLink(textToFind: link.url!.absoluteString, linkURL: link.url!.absoluteString)
      }

      descriptionLabel.attributedText = attributedDescription
    }

    loadVideo()
  }
}
A tela de detalhes do vídeo é controlada pela classe YoutubeVideoTableViewController. Nela podemos destacar a propriedade supportedInterfaceOrientations que permite que a tela seja exibida em modo retrato e modo paisagem. A propriedade videoListItem é os dados do vídeo recebido pela tela principal. A propriedade playerView da classe YTPlayerView é o nosso player do YouTube. Atribuimos o delegate ao nosso controller para acessarmos alguns métodos que serão vistos posteriormente.
No método loadData() buscamos as informações do vídeo igual fizemos na tela principal. Destaque para a duração do vídeo onde transformamos a duração de segundos para o formato hh:MM:ss. Na descrição adicionamos um destaque aos links dentro da descrição do vídeo.
extension NSMutableAttributedString {
  public func setAsLink(textToFind: String, linkURL: String) {
    let foundRange = self.mutableString.range(of: textToFind)

    if foundRange.location != NSNotFound {
      self.addAttribute(NSLinkAttributeName, value: linkURL, range: foundRange)
    }
  }
}
O método setAsLink(textToFind:linkURL:) está definido no Utils.swift.
// MARK: -
extension YoutubeVideoTableViewController {
  // MARK: -
  public func loadVideo() {
    let playerVars = ["playsinline": 1]
    playerView.load(withVideoId: videoListItem.id, playerVars: playerVars)
  }

  public func playVideo() {
    playerView.playVideo()
  }
}
Para auxiliar na manipulação dos vídeos criamos dois métodos. O método loadVideo() onde carregamos o vídeo no player. Aproveitamos o método para inserir o parâmetro playsinline igual 1 para rodar o vídeo sem maximizar o player. Você pode encontrar a lista com os outros parâmetros do player aqui.
O outro método foi o playVideo() onde inicializamos a execução do vídeo.
// MARK: -
extension YoutubeVideoTableViewController: YTPlayerViewDelegate {
  //MARK: - YTPlayerViewDelegate
  func playerViewDidBecomeReady(_ playerView: YTPlayerView) {
    playVideo()
  }

  func playerViewPreferredInitialLoading(_ playerView: YTPlayerView) -> UIView? {
    let tempPath = FileManager.default.urls(for: .cachesDirectory, in: .userDomainMask).first!
    let photoPath = tempPath.appendingPathComponent("t-\(videoListItem.id).jpg")

    if FileManager.default.fileExists(atPath: photoPath.path) {
      if let photo = UIImage(contentsOfFile: photoPath.path) {
        return UIImageView(image: photo)
      }
    }

    return nil
  }
}
No delegate YTPlayerViewDelegate implementamos dois métodos. O método playerViewDidBecomeReady(_:) é chamado quando o iframe do player for carregado no UIWebView. Nele iniciamos a execução do vídeo.
OBS: Poderíamos iniciar o vídeo de forma automática passando a propriedade autoplay igual a 1 junto com a propriedade playsinline para o método load(withVideoId:playerVars:).
No método playerViewPreferredInitialLoading(_:) carregamos a imagem do diretório de cache para mostrar enquanto o player é inicializado.
import UIKit

@UIApplicationMain
class AppDelegate: UIResponder, UIApplicationDelegate {
  private let apiKey = "AIzaSyCHr59bM5wVrLizbdOqwOVCUWWVspHzjls"

  var window: UIWindow?

  func application(_ application: UIApplication, didFinishLaunchingWithOptions launchOptions: [UIApplicationLaunchOptionsKey: Any]?) -> Bool {
    var youtube = Youtube()
    youtube.set(apiKey: apiKey)

    let youtubeTableViewController = window?.rootViewController?.contentViewController as! YoutubeTableViewController
    youtubeTableViewController.youtube = youtube

    return true
  }
}
Para finalizar temos a inicialização do objeto youtube, a definição da chave da API e a passagem do objeto youtube para a view principal no AppDelegate.
Obs: Esta key já foi excluída. Você deve substituí-la pela key que você gerou.
extension UINavigationController {
  open override var shouldAutorotate: Bool {
    return true
  }

  open override var supportedInterfaceOrientations: UIInterfaceOrientationMask {
    return visibleViewController?.supportedInterfaceOrientations ?? .allButUpsideDown
  }
}

extension UIViewController {
  var contentViewController: UIViewController   {
    if let navcon = self as? UINavigationController     {
      return navcon.visibleViewController!
    } else {
      return self
    }
  }
}
Outras extensões do Utils.swift que utilizamos no projeto.
Conclusão
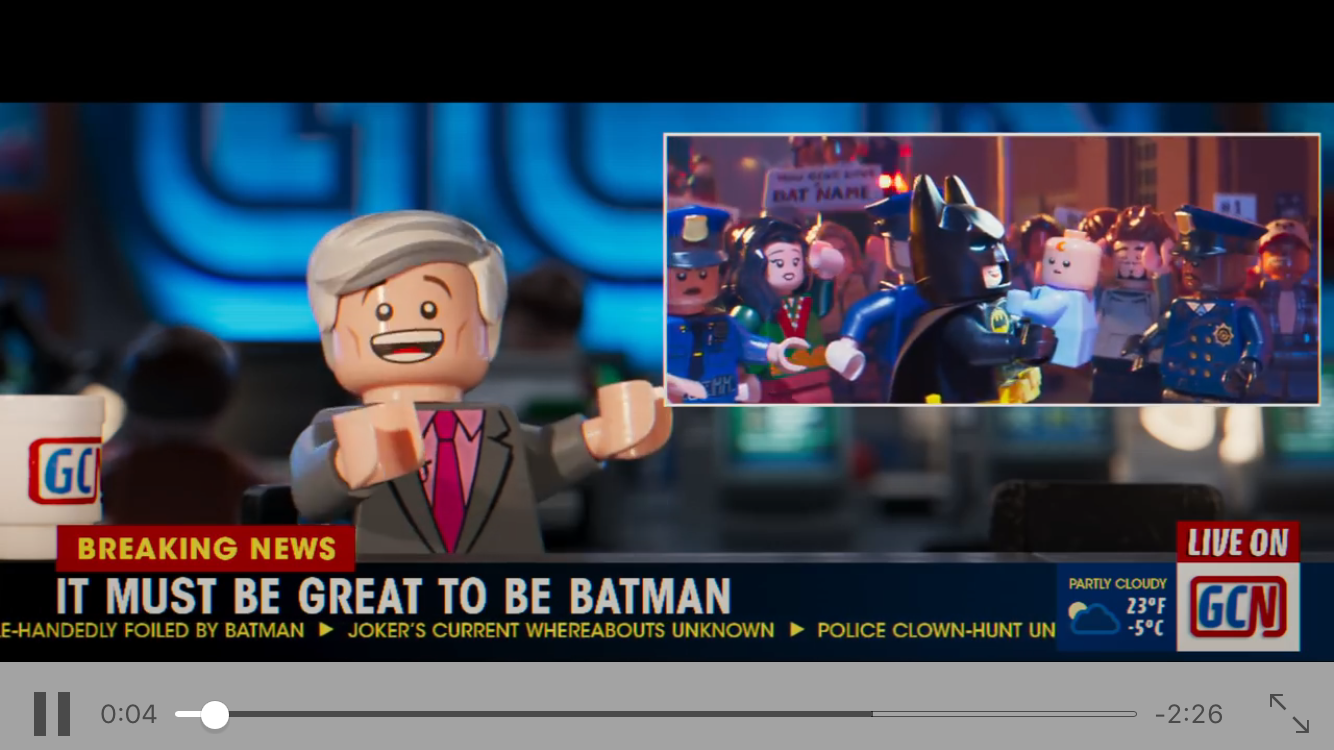
O nosso aplicativo ficou com o seguinte visual.


Animação do tableView
Execução do video em modo retrato
Execução do video em modo paisagem
A biblioteca YouTube-Player-iOS-Helper é um grande facilitador para a exibição de vídeos do YouTube pois permite uma integração com as funções do javascript de maneira transparente permitindo que nos preocupemos com a regra de negócio do aplicativo ao invés de ficar construindo wrappers para interação com javascript. Como a biblioteca é mantida pelo próprio YouTube temos a segurança de ter um fonte que estará atualizado com as alterações do player.
Espero que tenham gostado do artigo. Qualquer dúvida, crítica ou sugestão de novos assuntos deixe um comentário abaixo. Caso queira entrar em contato pode me chamar no twitter @mateusfsilva. Se gostou compartilhe.
